Monday, August 31, 2009

Maya Ambient Occlusion tips

You may have notice 2 strange attributes in the mib_amb_occlusion texture in Maya Id Inclexcland Id Nonself.

If you look in at the mib_amb_occlusion docs in the mental ray documentations, you can see the description of those attributes.

So with these you can include or exclude objects with a given id... or even force given object to cast AO on other objects but themself... this looks cool! so what appends when you set a value in there? You lose the occlusion or there are no changes right?

That's because these values are mental ray ids and you need to assign a mental ray id to your objects ... but how can I do this do you ask?

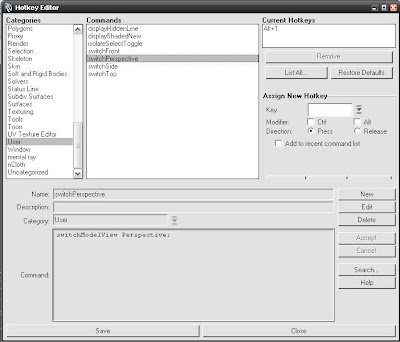
You need to add an extra attributes named miLabel to the transform nodes of your objects and set the id in this miLabel attribute.
But I need to add this attribute on all my objects manually you ask again? of course not! Use this script (see the readme file in the zip for installation and usage)

Now you can take advantage of this feature!

In this example I have added the miLabel attribute to all the objects, I have set the miLabel of the ground plane to 1, the cube to 2 and the sphere to 3. All the obejcts are assign to the same constant shader using the mib_amb_occlusion texture as color.
Here are different results when setting each value in the mib_amb_occlusion texture.

Id Inclexcl: 0 Id Nonself: 0
(both feature disabled)

Id Inclexcl: 2 Id Nonself: 0
(include only objects with id 2)

Id Inclexcl: -2 Id Nonself: 0
(Exclude objects with id 2)

Id Inclexcl: 0 Id Nonself: 2
(Objects with id 2 do not cast AO on themself)

Note that the use of the number 2 is arbitrary, I could have used 34 as my id on the cube and use 34 or -34 as a id value in the mib_amb_occlusion shader.

I hope this tips can help you achieve some tricky Ambient Occlusion renders.

I would like to thanks Daniel Kvasznicza http://www.inetgrafx.com for pointing this out to me.

Sunday, August 30, 2009

Hotkey view changes, isolate select and Hidden line shade view

In Maya, I never really liked having to toggle my 3d view to perpspective, front, side and top using the space bar menu or to have to dig into a panel menu to isolate my selection (I hate doing hide unselected... but that's me) ... I prefer using hotkeys for those.

Unfortunatly there is no way to hotkey these without having to create the commands using mel.
Fortunatly creating a new hotkeyable command in Maya is really easy.

Here are a few hotkey commands I like to create for Maya:

Let's create the first hotkey command ... the toggle perspective view command.
First, open the Hotkey Editor.
1. In the Category section to the left, select the User Category.
2. Create a new entry by pressing New in the bottom part of the editor
3. Enter a name for the new command
4. In the command section copy paste this command: switchModelView Perspective;
5. Hit Accept to save the new command.
Now you can assign any hotkey to the command to toggle the current view to a perpspective view!

It should look something like this:

Repeat step 2 to 5 using the following commands for the front, side and top view
switchModelView front;
switchModelView side;
switchModelView top;

I personnaly assign each command to Alt+1, Alt+2, Alt+3 and Alt+4

Now for the Isolate selection hotkey ...
The process is the same a above. Here is the mel script you need to copy in the command section:
string $panel = `getPanel -withFocus`;
int $panelStatus = `modelEditor -q -viewSelected $panel`;
if ( $panelStatus == 0 ) {
enableIsolateSelect $panel 1;
isolateSelect -state 1 $panel;
isoSelectAutoAddNewObjs $panel 1;
} else {
enableIsolateSelect $panel 0;
isolateSelect -state 0 $panel;
}

I assign this command to the "i" hotkey ... select one or more objects then hit "i" to go to isolate selection mode, press "i" again to get out of isolate selection mode.
Works like a charm and is way faster than doing hide unselected.

Now ... for those of you that worked in Softimage, you are probably missing the hidden line shaded mode.

Lucky you... here is how to do it in Maya:

For this one you will need to create 2 commands, one that will set the view in Hidden Line, one that will put it back to normal Maya shade. And you will need to override the default shade hotkey with the later command.

First, create the hidden line command:
Create a new command like the example above ... enter displayHiddenLine as the name of the command ... in the command section enter this mel script (the tabing might get messy because of the copy/paste, but fear not the command will work) :
{
string $currentPanel = `getPanel -underPointer`;
if ("" == $currentPanel) {
$currentPanel = `getPanel -withFocus`;
}
if ("" != $currentPanel) {
string $panelType = `getPanel -typeOf $currentPanel`;
if ($panelType == "modelPanel") {
modelEditor -edit -displayAppearance "smoothShaded" -displayTextures off
-displayLights "none" -wos 1 $currentPanel;
} else if (`isTrue "MayaCreatorExists"` && `scriptedPanel -exists $currentPanel`
&& `scriptedPanel -query -type $currentPanel` == "dynPaintScriptedPanelType") {
dynPaintEditor -edit -displayTextures 0 -displayAppearance "smoothShaded"
-displayLights "default" $gDynPaintEditorName;
} else if ($panelType == "scriptedPanel") {
string $scriptedType = `scriptedPanel -q -type $currentPanel`;
if ($scriptedType == "referenceEditorPanel") {
global string $gReferenceEditorModelEditor;
modelEditor -edit -displayAppearance "smoothShaded" -displayTextures off -displayLights "default" $gReferenceEditorModelEditor;
}
}
}
};


You will also need to create the new toggle shade command to replace the default one:
Create another new command ... enter displayShadedNew as the name of the command ... in the command section enter this mel script:
{
string $currentPanel = `getPanel -underPointer`;
if ("" == $currentPanel) {
$currentPanel = `getPanel -withFocus`;
}
if ("" != $currentPanel) {
string $panelType = `getPanel -typeOf $currentPanel`;
if ($panelType == "modelPanel") {
modelEditor -edit -displayAppearance "smoothShaded" -displayTextures off
-displayLights "default" -wos 0 $currentPanel;
} else if (`isTrue "MayaCreatorExists"` && `scriptedPanel -exists $currentPanel`
&& `scriptedPanel -query -type $currentPanel` == "dynPaintScriptedPanelType") {
dynPaintEditor -edit -displayTextures 0 -displayAppearance "smoothShaded"
-displayLights "default" $gDynPaintEditorName;
} else if ($panelType == "scriptedPanel") {
string $scriptedType = `scriptedPanel -q -type $currentPanel`;
if ($scriptedType == "referenceEditorPanel") {
global string $gReferenceEditorModelEditor;
modelEditor -edit -displayAppearance "smoothShaded" -displayTextures off -displayLights "default" $gReferenceEditorModelEditor;
}
}
}
};

Now you need to assign the displayShadedNew command to the 5 hotkey so that it override the default Maya hotkey then assign displayHiddenLine to any hotkey ... i personnaly use Shift+5.

I hope that you like these simple tips, they are quite simple but they can surprisingly speed up your work.

Cheers

mip shaders in Maya 2010

As you might know the mip shaders are not exposed by default in Maya, this is still true in Maya 2010.

I have modified the factory script mentalrayCustomNodeClass.mel to expose all the mip shaders in Maya.


Tuesday, August 25, 2009

Progressive Rendering script Update

I have updated the Progressive Rendering script. You can download the new version on highend3d by following this link:
EDIT:
Here is the link to download the script on the new creativecrash.com sit (prev iously highend3d.com)

The main change is the render window integration. I have added an icon directly in the render window to enable or disable the Progressive Rendering

You can also display the Options UI by right-clicking the icon

I hope you like this update.

Good progressive renders to you all :)

Thursday, August 20, 2009

Tutorial on mip shader in Softimage

Digital Tutors launched their new online tutorial library. This new learning platform is extremely well done, watching tutorial online beats buying DVD's in my opinion.

You can register for a free trial here http://www.digitaltutors.com/09/register.php

In the free tutorial you can watch 8 videos on using the mental ray production shaders in Softimage. I found these tutorials interesting.

I played with the mip shaders before, but I still learned a few thing in these tutorials.

Mental Ray Progressive Rendering in Maya 2010

Maya 2010 comes pakaged with Mental Ray 3.7.53
This version of Mental Ray have a really cool new feature called the Progressive Rendering.
This feature is not yet implemented in Maya 2010, but fortunatly for us Autodesk designed the string options.

With the string options, you can add any Mental Ray options and set it's value then Maya will pass this information to Mental Ray enabling the Mental ray feature! This is great because Maya users don't have to wait for Autodesk to implement new Mental Ray features.

Of course using the string options are not very user friendly ... that's why I have create this script to add the string options to enable Mental Ray's Progressive Rendering.

You can download the script here.


Install the script an execute it ...
This little window will appear, enable the Progressive Rendering and start a render or an IPR!
Adjust any of the options from this window instead of having to edit string options manually.

The Progressive Rendering works like a charm in IPR, tweak your lights and material faster than before!

Enjoy!